This is a short beginner tutorial. You will use Layers, utilize the Pen Tool and its sister tools, such as the Convert Anchor Point Tool, and Direct Selection Tool, to draw and colorize a vector Bart Simpson in Adobe Illustrator. Learn some cool graphic design tips and tricks from the following seven must-read Facebook tutorials. First we will create the basic shape outlines which comprise his body, then create the shadows and highlights to finish off the artwork. If you have any questions of how I created Bart feel free to download the file and take a look.

Step 1:
Start off by creating a new Illustrator Web Document to the size of 370 pixels (width) by 510 pixels (height), which is the approximate size of the Bart Simpson image.
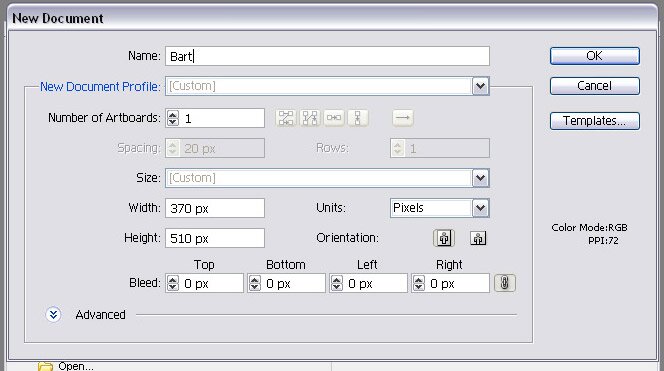
Place the picture of Bart onto your artboard by clicking File->Place then save your file. I searched google images, but you can download the image file and the completed Bart vector HERE.
Lock the Bart image layer then create a New Layer on top, in which you will now draw your outlines.

Step 2:
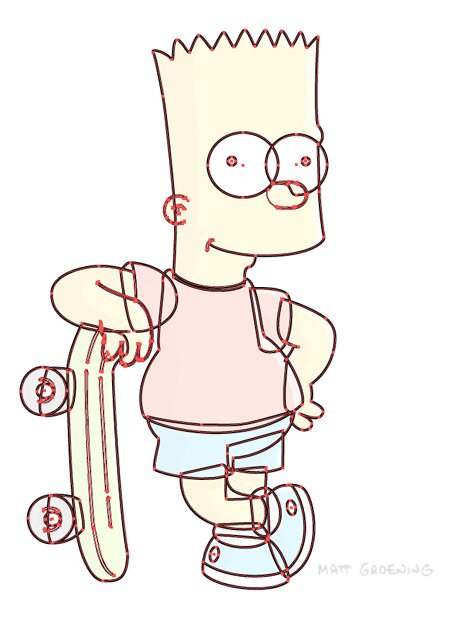
Using the Pen Tool with a 2 pixel Stroke, we are going to trace around and create the main shapes of his body to form Bart’s head, arms, legs, body, and skateboard.

As you might have noticed I traced around the head, ears, and nose, then using the Ellipse Tool, made the eyes and eyeballs, creating separate objects to form the head, and so on. Using the Convert Anchor Point Tool and Direct Selection Tool you can refine your outlines to almost exactly match that of the image file.
Tip: To more accurately see what you’re tracing, change the Fill Color of your Stroke to None (The white box with the red line through it) before you start.
Now that you’ve traced around the main parts of the character and skateboard to duplicate the black outline Matt Groening drew, you’ll have Strokes (ex. the inside of the ear) and Objects (ex. the outline of the head and eyeballs).
Step 3:
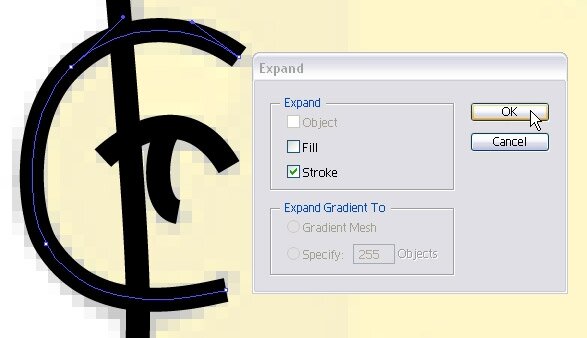
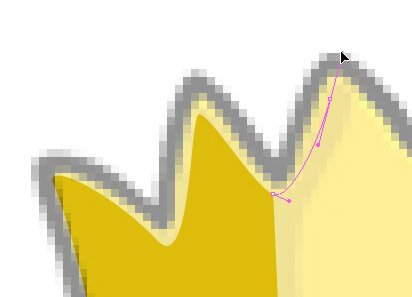
The strokes need to have their ends tapered so that they look more true to the actual cartoon drawing. Use the Selection Tool to choose a stroke, such as the ear. Click Object->Expand. Select the Stroke checkbox and click Ok.
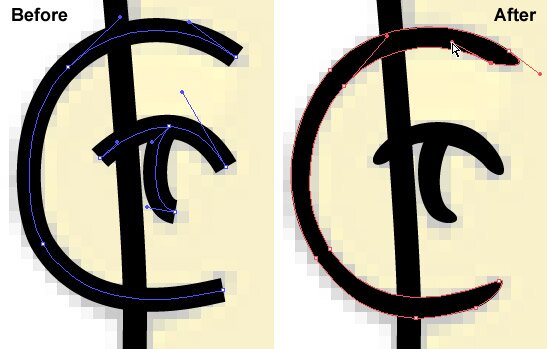
You are now able to click on the edges of your stroke with the Convert Anchor Point Tool to round your edges. Combined with the Direct Selection Tool to move and adjust the anchor points, you will be able to create a great tapered edge. Finish tapering the rest of the strokes.
Step 4:
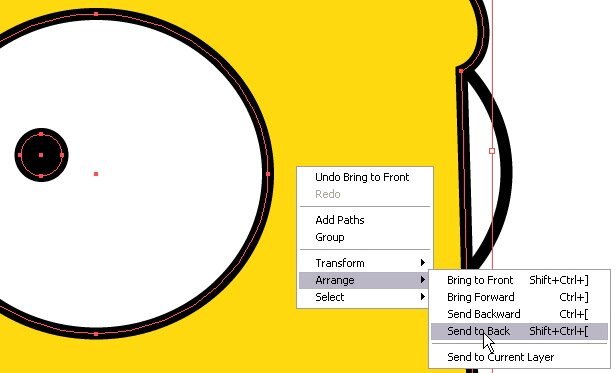
The next step with this layer is to arrange your Strokes from front to back until they appear as they do in the image file. Right-Click->Arrange on a stroke or Left-Click, then go up to the top menu and click Object->Arrange->Send to Back. After you’re done go ahead and lock this layer since we are done with it.
Step 5:
Now we’re going to create a New Layer on top of the previous and make the shadows and highlights by tracing around them individually with the Pen Tool.
Adjust the Fill Color of each shape according to the Matt Groening’s drawing. My shadows and highlights are shown below.
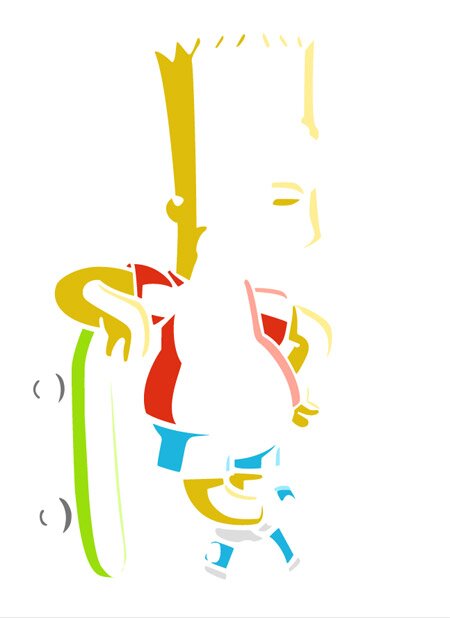
When both of the layers are finished you should have a very nice Bart Simpson character which is scalable to any size.
Download
AI Vector Bart Simpson
License: Free for personal use only. You may not redistribute.